In this section, we are going to understand the working of the PostgreSQL IDENTITY and GENERATED constraint, which is used to generate the PostgreSQL Identity column for a particular column, examples of altering an Identity column and understand the working of Sequence options with example.
We will also see the example of adding an identity column to the current table and modify the Identity column to delete the GENERATED AS IDENTITY Constraint using the ALTER TABLE command.
What is the PostgreSQL Identity Column?
From the PostgreSQL version 10, the PostgreSQL developers announced a new constraint called GENERATED AS IDENTITY, which is used to assign a unique number to a column automatically.
Syntax of PostgreSQL Identity column
The Syntax for PostgreSQL GENERATED AS IDENTITY constraint is as follows:
column_name type GENERATED { ALWAYS | BY DEFAULT } AS IDENTITY[ ( sequence_option ) ] In the above Syntax, we have the following points, which needs to be remembered while using in the real-time example:
- The type parameter can be SMALLINT, INT, or BIGINT.
- The GENERATED ALWAYS is used to require PostgreSQL to create a value for the identity column constantly.
- PostgreSQL will occur an error if we try to update or insert the values into the GENERATED ALWAYS AS IDENTITY column.
- But if we supply a value for insert or update, the GENERATED BY DEFAULT is used to tell PostgreSQL to create a value for the identity column.
- And to use the system-generated value, PostgreSQL will use the particular value for inserting into the identity column.
Example of PostgreSQL Identity column
Let us see different examples to understand how the PostgreSQL identity column works.
- Example of GENERATED ALWAYS
We are creating one new table as Vegetable with the CREATE command’s help and inserting some values using the INSERT command.
To create a Vegetable into an Organization database, we use the CREATE command.
The Vegetable table contains the two columns such as veggie_id and Veggie_name column, where we use the Veggie_id as the identity column:
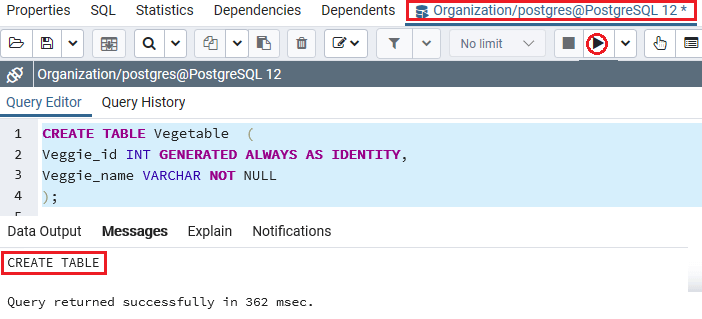
 CREATE TABLE Vegetable  (

Veggie_id INT GENERATED ALWAYS AS IDENTITY,

Veggie_name VARCHAR NOT NULL

);
Output
On executing the above command, we will get the following message, which displays that the Vegetable table has been created successfully into the Organization database.
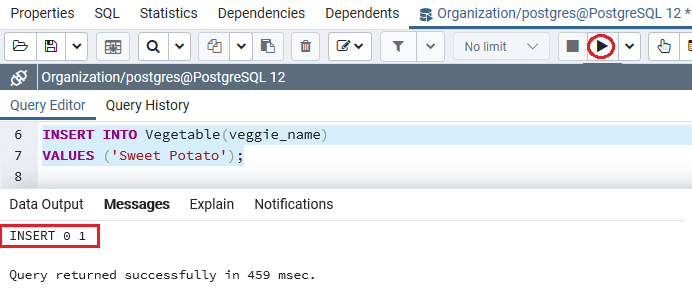
When the Vegetable table is created successfully, we will insert some values into it with the INSERT command’s help.
 INSERT INTO Vegetable(veggie_name)

VALUES ('Sweet Potato');
Output
After implementing the above command, we will get the following message window, which displays that the one value have been inserted successfully into the Vegetable table.
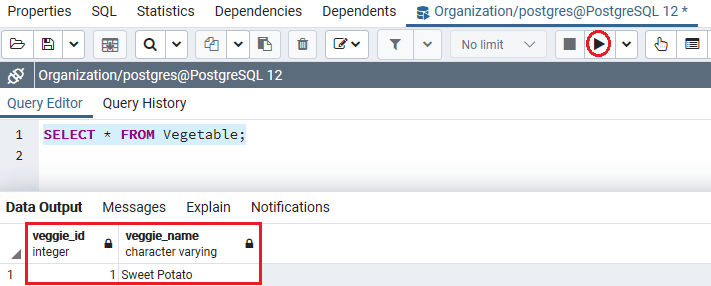
As we know that the Veggie_id column has the GENERATED AS IDENTITY constraint, that’s why PostgreSQL creates a value for it as we can see in the following command:
SELECT * FROM Vegetable; Output
After successfully implementing the above command, we will get the below output, which displays all the data present in the Vegetable table:
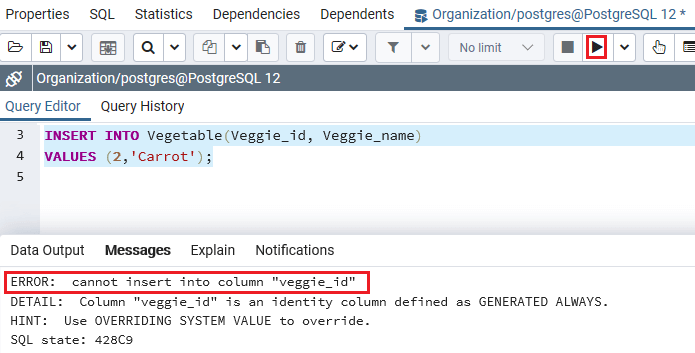
Now, we will insert a new row by supplying values for both Veggie_id and Veggie_name columns:
  INSERT INTO Vegetable(Veggie_id, Veggie_name)

VALUES (2,'Carrot');
Output
After executing the above command, Postgresql raises the below error: we cannot insert the value into the veggie_id column because the Veggie_id column is an identity column and described as GENERATED ALWAYS.
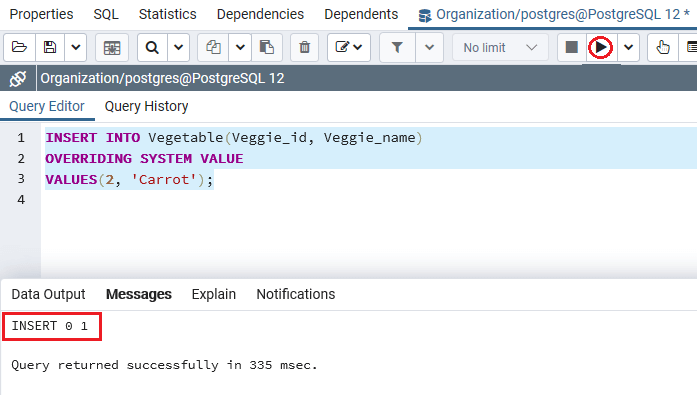
We can use the OVERRIDING SYSTEM VALUE clause to resolve the above error in the following command:
INSERT INTO Vegetable(Veggie_id, Veggie_name)

OVERRIDING SYSTEM VALUE

VALUES(2, 'Carrot');
Output
We will get the following message window after executing the above command, which displays that the specified values have been inserted successfully into the Vegetable table.
Note: In its place of GENERATED ALWAYS AS IDENTITY, we can use the GENERATED BY DEFAULT AS IDENTITY.
Example of GENERATED BY DEFAULT AS IDENTITY
Let us see sample examples to understand how the Generated by default as identity works.
Step1
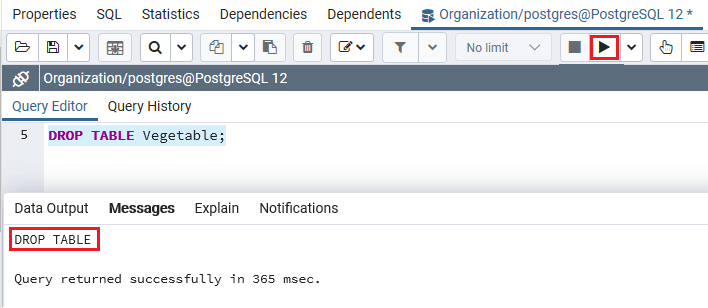
Firstly, we will drop the Vegetable table and reconstruct it by using the GENERATED BY DEFAULT AS IDENTITY in its place of GENERATED ALWAYS AS IDENTITY:
DROP TABLE Vegetable; Output
After executing the above command, we will get the below message window, which says that the Vegetable Table has been dropped successfully.
Step2
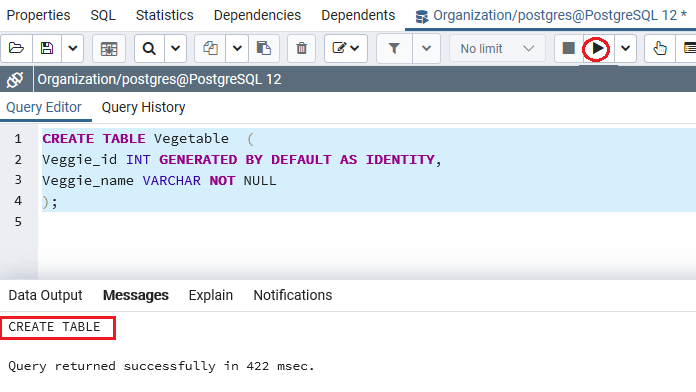
Now, we will create a similar table using the GENERATED BY DEFAULT AS IDENTITY, as shown in the following command:
CREATE TABLE Vegetable  (

Veggie_id INT GENERATED BY DEFAULT AS IDENTITY,

Veggie_name VARCHAR NOT NULL

);
Output
On executing the above command, we will get the following message window, which displays that the Vegetable table has been created successfully.
Step3
After successfully created the Vegetable table again, we will insert some value into using the INSERT command, as shown below:
 INSERT INTO Vegetable(Veggie_name)

VALUES('Onion');
Output
After implementing the above command, we will get the following message window, which displays that the one value have been inserted successfully into the Vegetable table.

Step 4
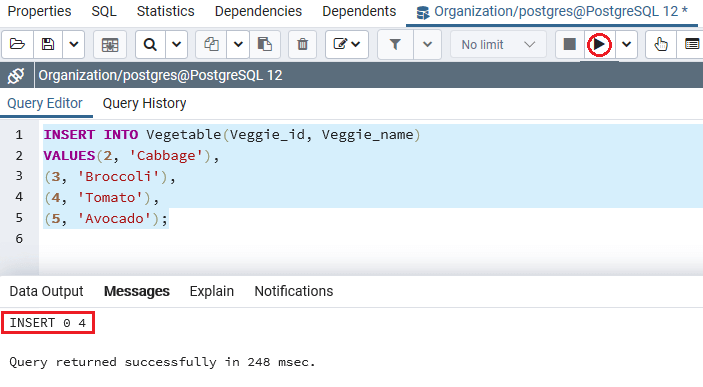
After that, we are inserting some more values into the Vegetable table having the Veggie_id as shown in the following command:
INSERT INTO Vegetable(Veggie_id, Veggie_name)

VALUES(2, 'Cabbage'),

(3, 'Broccoli'),

(4, 'Tomato'),

(5, 'Avocado');
Output
After executing the above command, we will get the following message window, which displays that the four values have been inserted successfully into the Vegetable table.
Note: If we compare both the commands, we can see that the usage of the GENERATED ALWAYS AS IDENTITY constraint occurs an error whereas the GENERATED BY DEFAULT AS IDENTITY constraints executed successfully and not raise any error.
- Example of Sequence options
We can define the sequence options for the system-generated values as the GENERATED AS IDENTITY constraint uses the SEQUENCE object.
Let us see an example to see the working of Sequence options.
In the below command, we described the starting value and the increment value, as shown below:
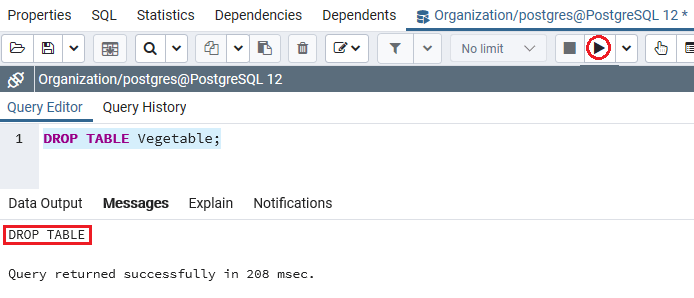
DROP TABLE Vegetable; Output
After executing the above command, we will get the following message window, which shows that the specified table has been dropped successfully.
Now, we will create the same table (Vegetable) once again, but this time, we are using the Start and Increment parameter as shown in the below command:
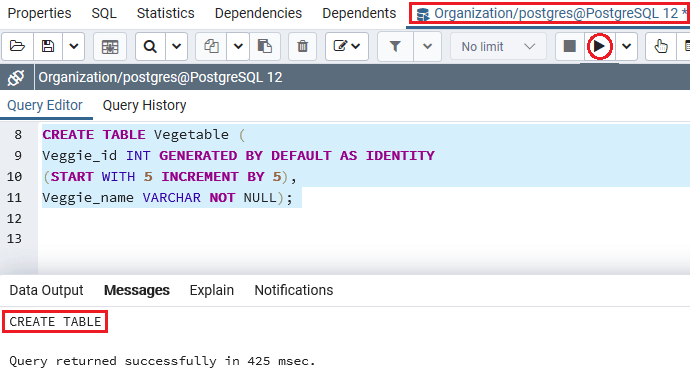
 CREATE TABLE Vegetable (

Veggie_id INT GENERATED BY DEFAULT AS IDENTITY

(START WITH 5 INCREMENT BY 5),

Veggie_name VARCHAR NOT NULL);
Output
We will get the following message window on executing the above command, which displays that the Vegetable table has been created successfully into the Organization database.
In the above command, the system-generated value for the Veggie_id column begin with 5, and the increment value is also 5.
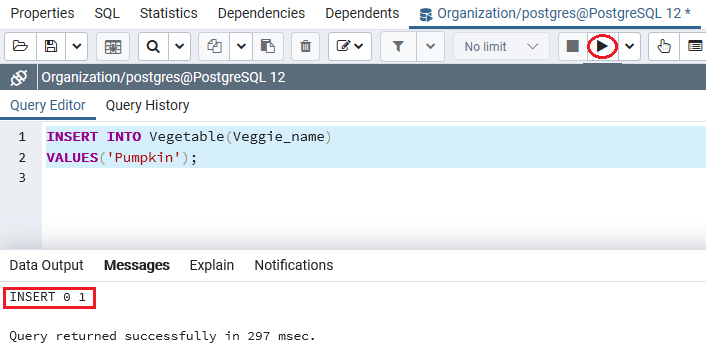
Now, we will insert a new value into the Vegetable table with the help of the INSERT command:
INSERT INTO Vegetable(Veggie_name)

VALUES('Pumpkin');
Output
After executing the above command, we will get the following output:
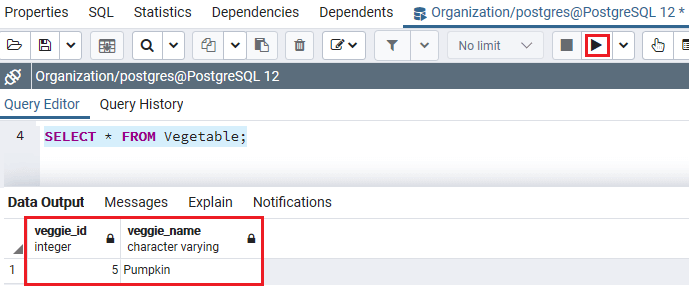
After creating and inserting the Vegetable table’s values, we will use the SELECT command to return all rows of the Vegetable table:
SELECT * FROM Vegetable; Output
After successfully implementing the above command, we will get the below output, which displays the starting value for Veggie_id column is 5:
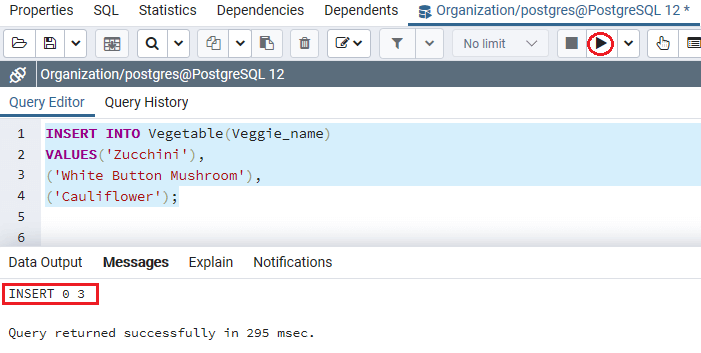
Once the above command executed successfully, we will insert some more row into the Vegetable table:
INSERT INTO Vegetable(Veggie_name)

VALUES('Zucchini'),

('White Button Mushroom'),

('Cauliflower');
Output
We will get the following message window after executing the above command, which displays that the specified values have been inserted successfully into the Vegetable table.
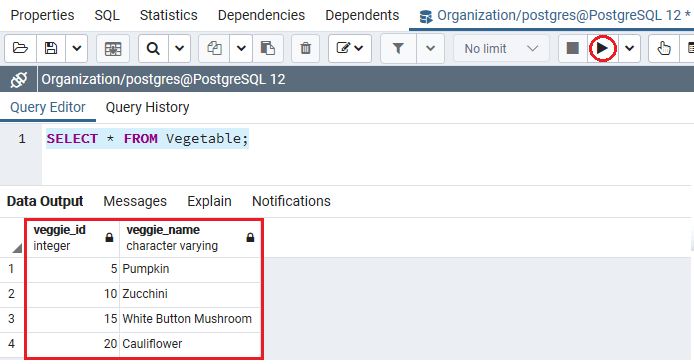
The value for the Veggie_id of the second row is 10 because we used the increment option while creating the Vegetable table:
SELECT * FROM Vegetable; Output
After successfully executing the above command, we will get the below output, which displays all the existing data in the Vegetable table:
Adding an identity column to the current table
We can add the identity columns to the current table with the help of below Syntax of the ALTER TABLE command:
The Syntax for adding an identity column to the current table
The following illustration is used to add an identity column to an existing table:
ALTER TABLE table_name

ALTER COLUMN column_name

ADD GENERATED { ALWAYS | BY DEFAULT } AS IDENTITY { ( sequence_option ) }
Let us see one sample example to understand the following:
To add an identity column to an existing table, we have to follow the below steps:
Step1: Creating a new table
We are creating one new table as Structure with the CREATE command’s help.
To create a Structure into an Organization database, we use the CREATE command.
The Purchase_details table contains the two columns, such as Str_id and Str_name
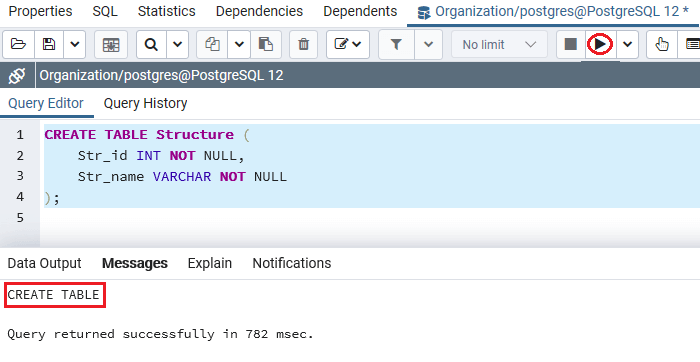
 CREATE TABLE Structure (

    Str_id INT NOT NULL,

    Str_name VARCHAR NOT NULL

);
Output
We will get the following message window on executing the above command, which displays that the Structure table has been created successfully into the Organization database.
Step2: Modify the Str_id column to the identity column
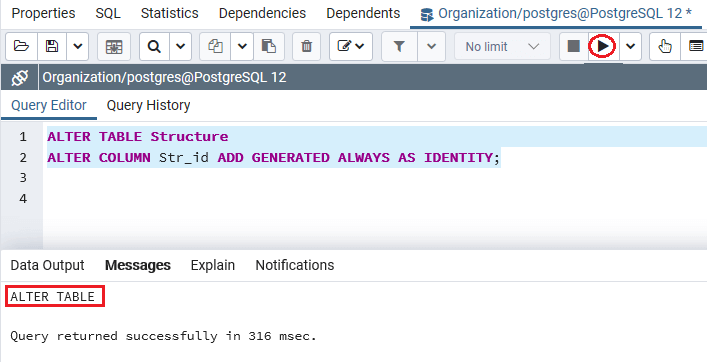
In the following command, we will use the ALTER Table command to change the Str_id column to the identity column:
  ALTER TABLE Structure

ALTER COLUMN Str_id ADD GENERATED ALWAYS AS IDENTITY;
Output
After implementing the above command, we will get the following message window, which displays that the Structure table has been altered successfully.
Note: The Str_id column needs to have the NOT NULL constraint; therefore, it can be modified to an identity column. Or else, PostgreSQL will occur the following error:
ERROR:  column "str_id" of relation "structure" must be declared NOT NULL before an identity can be added

SQL state: 55000
Describe Structure table in SQL Shell(psql)
For describing the Structure table in the SQL shell(psql) tool, we can use the following command, but before using the describe command, we will follow the below process:
- Firstly, we will open the psqlin our local system, and we will connect to the database where we want to create a table.
- For connecting an Organization database, we will enter the below command:
postgres=# \c Organization Output
After executing the above command, we will get the following output:

- Now, we will enter the below command to describe the Structure table into the Organization
\d Structure Output
On implementing the above command, we will retrieve the below output, which is what we expected from the Structure table:

Altering an identity column
The ALTER TABLE command is also used to alter the features of a current identity column, as shown in the following illustration:
The Syntax of altering the identity column
The following Syntax is used to change the identity column:
Alter table table_name

Alter column  column_name

{ SET GENERATED { ALWAYS| BY DEFAULT } |

 SET sequence_option | RESTART [ [ WITH] restart ] }
Let us see one sample example for our better understanding of how we can change the identity column using the ALTER TABLE command:
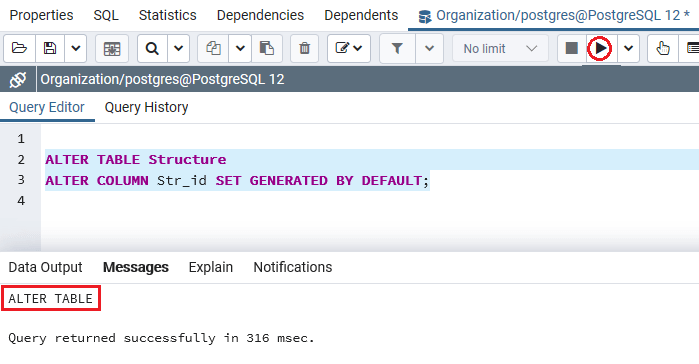
In the below command, we modified the Str_id column of the Structure table with GENERATED BY DEFAULT constraint:
ALTER TABLE Structure

ALTER COLUMN Str_id SET GENERATED BY DEFAULT;
Output
After implementing the above command, we will get the following message window, displaying that the Structure table has been modified successfully.
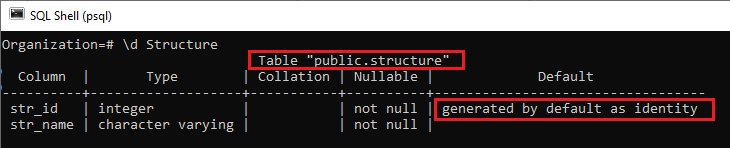
And to describe the design of the Structure table in the psql; we will use a similar command as above:
\d Structure Output
After executing the above statement, we will get the following output, which shows that the Str_id column has been modified from GENERATED ALWAYS to GENERATED BY DEFAULT.
Deleting the GENERATED AS IDENTITY Constraint
To delete the GENERATED AS IDENTITY constraint from the current table, we will use the below syntax:
The Syntax for deleting the Generated AS Identity Constraint
The following illustration is used to delete the Generated as Identity Constraint from the specified table:
ALTER TABLE table_name

ALTER COLUMN column_name

DROP IDENTITY [ IF EXISTS ]
Let us see one example, which shows the working of removing the Generated AS Identity Constraint.
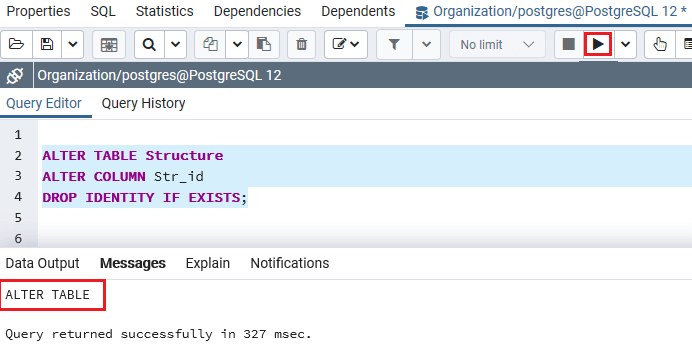
In the below command, we are deleting the GENERATED AS IDENTITY constraint column from the Str_id column of the Structure table:
ALTER TABLE Structure

ALTER COLUMN Str_id

DROP IDENTITY IF EXISTS;
Output
After implementing the above command, we will get the following message window, which shows that the GENERATED AS IDENTITY constraint column of the Structure table have been removed successfully.
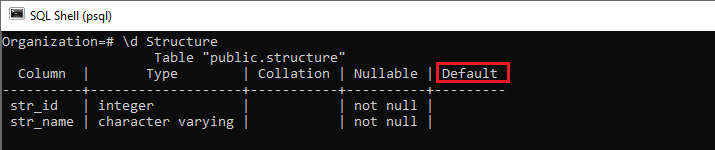
We will use the below command once again to check whether the GENERATED AS IDENTITY constraint column from the Str_id column of the Structure table has been removed successfully or not in the SQL shell (PSQL):
\d structure Output
After implementing the above command, we will get the following result, which displays that the GENERATED AS IDENTITY constraint column has been deleted from the Structure table.
Overview
In the PostgreSQL Identity Column section, we have learned the following topics:
- We learned the working of PostgreSQL Identity Column by using the GENERATED AS IDENTITY
- We have seen the examples of GENERATED ALWAYS constraint and GENERATED BY DEFAULT AS IDENTITY constraint.
- We understood the working of Sequence options with some sample examples.
- We can also add an identity column to an existing table with the ALTER TABLE command’s help.
- In this section, we also understand how to modify the Identity column using the ALTER TABLE command.
- We used the ALTER TABLE command to delete the GENERATED AS IDENTITY Constraint.
Leave a Reply